
Hi all!
Good night and I hope that you are doing well. In this journal, I would like to share with you about AWS App Runner. Specifically, I will explain how to deploy a simple application on there and set it so it will use a custom domain. For the domain, I will use Amazon Route53 that already we discussed in the previous journal. You can check it out here yah:)
Did you know about AWS App Runner? This service is really awesome and simple to use. Based on the documentation, AWS App Runner provides a fast, simple, and cost-effective way to deploy from source code or a container image directly to a scalable and secure web application in the AWS Cloud. You don’t need to learn new technologies, decide which compute service to use, or know how to provision and configure AWS resources. Read more here.

There are two features that make you need to consider using AWS App Runner. First, the application we will deploy on there is container-based. So, it’s really simple when we want to migrate an existing application from on-premise to AWS App Runner because it will be nicely integrated and doesn’t necessarily to overwhelmed by the infrastructure layer or dependency.
Then, there is a deployment trigger feature that we can use on it. AWS App Runner is well-integrated with Amazon Elastic Container Registry (ECR). If we are using a private repository on Amazon ECR, we can set automatic for the deployment trigger and whenever a new image pushes on a repository it will trigger AWS App Runner to deploy a new version of the application.
We can set the specification of the application such as vCPU and vRAM and define environment variables. We can also set autoscaling and health check configurations to ensure that our application is able to always provide the request by the user.
The other awesome feature provided by AWS App Runner is observability. We can do trace the application deployed on AWS App Runner by AWS X-Ray. It’s a really nice option when we want to debug the application.
Okay. Enough for the explanation. Let’s move into the tutorial, step-by-step to deploy the application.
First, we have to go on AWS Management Console.
In a search form, type app runner and click on it.

Below is the dashboard of AWS App Runner. Click create service to create a new service.

On the first page, we have to define the application source. Choose container registry if the image has been pushed or choose source code repository if not. Then click Next.

The next step, as I mentioned before we can define the specification such as vCPU, vRAM, env and port.

Scroll down and we can define the autoscaling configuration. For example, I define the min is 1 instance and the max is 10 instances. We can define the custom health check configuration to ensure the application is always monitored.

Scroll down and on the security section, we can configure the AWS KMS key for encryption.

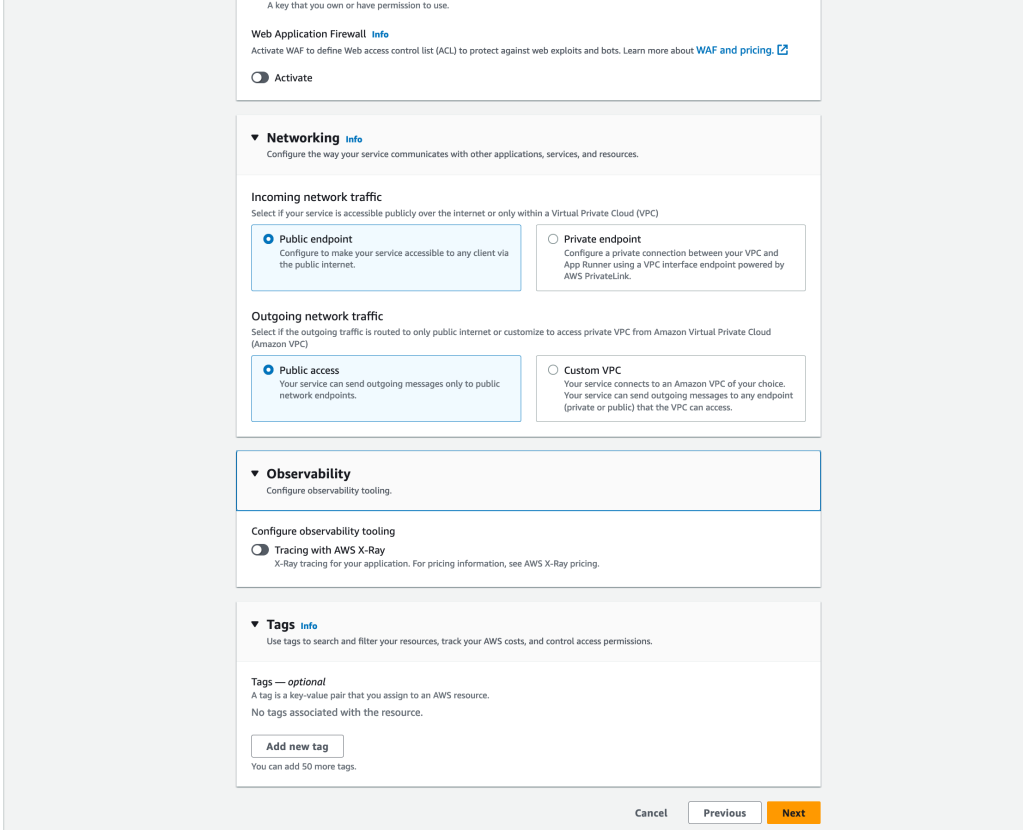
Scroll down, and choose the incoming network traffic. For example, I choose public because the application will be accessed by users on the internet. Tick Tracing with AWS X-Ray if we want to enable observability and click Next.
On the review section, verify and ensure is correct and click Create button.

Wait until the service status is running.

Click the service name to see details and click Default Domain to access the application.

Below is the application example.

Until this time, our application is running and accessible 🙂 but, still use the default domain provided by AWS. We will continue to configure the custom domain.
On application detail, click Custom domains tab and click Link domain

Type the domain name and click Link custom domain.

Then, it will show two records that we have to configure on DNS Management. First, CNAME record to certificate validation so our application will be accessed by HTTPS. Then DNS target for the application itself.

Wait until the status become active.

Try to access the application from the browser using a custom domain

Cheers!
